(Belated) overnight trip report – March 21st/22nd

Toward the end of March, I spent a weekend exploring the old farm woods and the surrounding area, finally locating all the boundary markers of the property and discovering some other interesting features of the “neighborhood” as well. At that time, there was still a good bit of snow on the ground, most of which has since melted, and the temperatures were a lot lower, too, with about -5ºC/+23ºF during the day and -12ºC/+10ºF at night.

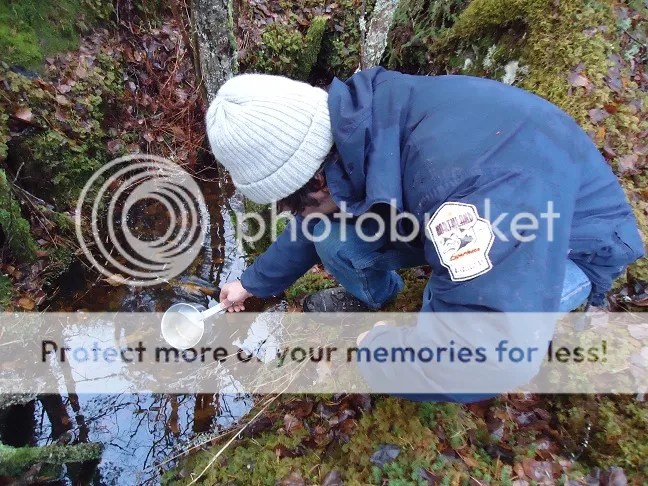
Before choosing a new campsite and setting up camp, I wandered around looking for the back property markers, taking some pictures as I went along.

I found a nice, reasonably flat spot at a far corner of the property and set up the MIL-TEC tarp in my beloved Holden tent configuration. So far, I’ve been very pleased with this tarp, which I bought a little over a year ago.

Once my camp was set up, I located some potential firewood nearby. Besides a few smaller dead pine saplings, I found a nice larger dead pine which had partially fallen over some time ago. Getting a hung-up tree like this unstuck can be very dangerous, so I’m not going to give instructions on that there. All I will say is that it’s a good idea to read up on the subject and have an experienced tree feller go out into the field with you to show you how to do it. In general, though, the idea is to first cut the tree at the base and then carefully move up the trunk, cutting section by section, until it can be freed from the other tree.

I cut the trunk into campfire-sized pieces and also collected the dry branches from the top of the tree.

To ignite the dry branches, I would need something finer and easily flammable, so I went back to an area where I had remembered seeing lots of birch bark on the ground. This bark had been stripped off some trees when the loggers came through to thin out the forest last year.

After splitting up some of the sections of the pine tree I had dislodged and sectioned, I laid down some lower-quality, partially rotten pieces of wood in the spot I had chosen for the campfire. On this I placed a piece of birch bark, which I scraped with my BushProwler knife from Ilkka Seikku to create a fine pile of paper-thin shavings to ignite with my ferrocerium rod. I then added progressively bigger pieces of wood until the fire was ready for me to start heating up some food.

Once I had eaten and relaxed a bit, I decided to spend the evening exploring the area some more.

Plenty of animal sign:

Curiosity led me to climb some of the higher hills in the area, which rewarded me with a really nice view. First, looking down at my campsite:

This was followed by a short hike down to the lake, where I plan to do some fishing this season.

After hiking around, I sat by the fire for a long while, ate some dinner and watched the stars appear one-by-one as the sky darkened to night. I slipped into my nested sleeping bags in my poncho bivy and continued watching the sky through the doorway of my tent until I drifted off. After a good night’s rest, I arose in the morning, shook off the sleep and started the morning fire. Once again, I dined on Finnish rice pies (riisipiirakka) and a meat pie (lihapiirakka). I also boiled up some water for instant coffee in my Swedish mess kit lid.

Wanting to take advantage of being in the neighborhood, I packed up camp and hiked back to the cabin site, where I spent the rest of the afternoon working on the future homestead.

Hope you enjoyed this quick overnight trip report. Stay tuned for more!

Kampin’ in a kota

Hey dudes and dudettes! It’s been a while since I’ve posted anything here at The Weekend Woodsman, but it’s not because of a lack of interest. First we had the holidays, then I got swamped with work and then soon after that the Woodsboy got the chicken pox and our whole family came down with a nasty drawn-out flu (possibly swine flu) right after that. The unseasonably warm winter we’ve been experiencing is another reason why I haven’t been getting out much. While some of you were (and are again) experiencing a polar vortex, we’ve had more of a “tropical vortex” up here in Finland. So far this winter, we’ve only had about 3 weeks of real winter temperatures (and of course it had to be during the time when I was busy/sick). As I write this in mid-February, the temperature is about 1°C/34°F. During a normal winter, it would not be unusual at all to be seeing temperatures around -40°C/-40°F right now. Anyhoo, the warm temperatures, coupled with being busy, sick and occupied with a few other things had not been very conducive to doing anything outdoors-related.

For most of the winter, though, mi amigo Alejandro from Spain and I had been looking forward to a winter campout, but because of the reasons mentioned above, it just wasn’t happening. When the second weekend of February rolled around, everything fell into place and we were able to get out for a “winter” (and I use that term loosely) overnighter.  After a little planning the week prior, I picked Alex up on Saturday morning and then drove out to my mother-in-law’s country property. We took the car as far as we could without getting stuck in the snow and then hiked to our destination. Here’s a back road along the way:

Because of the melt/thaw/melt/thaw cycles we’ve experienced this winter, there was a lot more standing water/ice than years past.

Moose tracks along the way:

Once we reached the site, we started getting our shelter materials together. I had slept in a kota (tipi-like shelter) a few years ago and figured it would be a good experience for Alex. This kind of shelter is a lot different from a typical camping tent, as it allows you to have a full campfire inside. The poles and tarp for the shelter were located nearby where I had left them. We first set up a tripod upon which we’d lean the remaining shelter poles.

Remaining poles in place:

Then the real battle started. In order to put the 6 m x 8 m tarp on the frame, we had to get it unstuck from the ground, and itself. After smashing lots of ice and carefully peeling the tarp from the forest floor, we managed to get it set up on the frame. It may not qualify as a dictionary-definition kota, but precise historical accuracy is not what we were aiming for. 😉

Now that our house was up, we could make it a home. Alex cut a bunch of spruce branches to use as bedding material and laid them out on the left side of the kota (and yes, that is a small spruce tree inside our shelter).

I set up my stuff on the right-hand side. For this trip, I used the Swedish SK-70 rucksack because its large capacity makes carrying extra winter gear easier.

Next on the agenda was making a fire for heating and cooking, as we were both getting hungry. We spent time gathering up and preparing materials for our fire and tried to get it started, but to no avail. Try as we might, we just couldn’t get a self-sustaining fire going, and ended up burning up all our fire prep. The reason? I had forgotten an important lesson from several years earlier. In order to have a fire burn properly in a shelter like this, there has to be sufficient intake of air from around the bottom and outlet of air and smoke at the top. There simply wasn’t enough open space at the bottom, and the hole at the top was too small as well. I kicked myself for letting this happen, because it was something that I had already experienced (and solved) before. Anyway, here’s hoping I remember for the next time around. 😉 We took the tarp off the poles and then hiked away from the campsite to get some dry birch wood and bark which had been laid up in a different location. After returning to the campsite and refitting the shelter cover for better air flow, we got a nice hot fire started. It was pretty much smooth sailing for the rest of the evening.

The temperature overnight probably didn’t even drop below freezing, and I distinctly remember rain or freezing rain pitter-pattering on the shelter during the night. In the morning, we got to work preparing a fire for our breakfast. Alex used my Skrama knife to split some birch wood into kindling, and I used my BushProwler. Then we both made a mess of shavings.

We shuffled around the remnants from the previous night’s fire in the fire pit and then set up our fire lay.

Breakfast for both of us would be oatmeal/porridge. I brought instant stuff, while Alex went traditional. He started by melting some snow in his pot.

By the time his snow was melted, I was almost ready to eat. 🙂

Having used up all my water during breakfast, I went to collect some more. The method I used was to squeeze snow into long pellets and then slip them into my metal water bottle. After I fit in as many as I could, I’d put it near the fire until the snow melted.

A few shots of our temporary abode:

A while later we made ourselves some lunch, let our fire die down and then started to pack up. We took the tarp off the shelter and placed it nearby after folding it up. We left the poles standing for next time. Come spring, I’ll cut that tarp to size so it fits perfectly on the frame, which will also prevent the ventilation issues we experienced. Speaking of spring, the way things are going, it’ll be here before we know it. I’m really hoping that we somehow get a nice cold spell for a while before the usual start of spring so I can get out there and do some more winter bushcrafting! We’ll see what happens. I’ll leave you with a picture of the dim winter sun as Alex and I hiked back to the car.

Quick winter-weather gear tip: Lip balm

Here in the north country, winter is the driest time of the year. As the temperature drops, so too does the amount of moisture in the air. Cold, dry and windy air tends to draw moisture from the body, which is why it’s especially important to drink lots of water in these kinds of conditions, but there are also other things you can do to counteract this effect. One of them is to use lip balm…on your skin!

Obviously, lip balm was intended to be used on chapped lips, but I’ve found that it also works very well to moisturize dry, rough skin, especially in certain spots on my hands. I simply apply it to small affected areas and rub it in a little. The moisturizing effect lasts for a long time, and it helps to prevent skin from becoming so dry that it cracks, especially on my knuckles and between my fingers. Why not just use moisturizing cream, you ask? Well, lip balm is already part of my kit, and it serves the purpose just fine!

But that’s not all! Besides being good for keeping your skin in good shape, lip balm also has other uses in the field. How about making dry, cracked leather items supple again? They are made of skin, after all. Wax- and petroleum-based lip balms are flammable, making them a potential fire-lighting aid in tough conditions. These ingredients could also make them good for things like small waterproofing tasks, metal joint lubrication etc.

Anybody have any other uses for lip balm? 🙂

¿Qué te gusta el bushcraft?

With temperatures dipping down to -10*C (14*F), but occasionally still rising a little above freezing, and with several centimeters/inches of snow already on the ground here in eastern Finland, we are on the cusp of real winter beginning. Soon the temperature will no longer peek above the freezing point until sometime in March, and the snow will have accumulated to well over a meter (over 3 feet) by that time. Before I switch to full-on winter mode, though, I wanted to write one more blog post about some doings of this past fall.

Almost a month ago, I headed out to the country property I’ve been visiting for the last pre-winter overnighter of the year. This time, I had the pleasure of being accompanied by a new friend who I met this past summer. Alex is originally from Spain, but lives not too far away from us and moved here about the same time we did. He’s very interested in learning about bushcraft and woodsmanship, and I am happy to share the little I know with him. He dropped by the weekend before Halloween to show me some bushcraft and camping gear he had been accumulating over the past few months, and we started planning an autumn overnight trip which would take place 2 weeks later.

The weather that weekend ended up being very wet and cool. It rained on and off, and our camp looked like a mud pit by the end of the trip. I was seriously wondering if the crappy conditions would turn Alex off to the idea of camping and bushcraft outside of summertime, but this wasn’t the case at all. Anyway, we drove out to the property and went straight to the campsite I’d been visiting somewhat regularly lately. Alex got to work right away collecting poles for his lean-to using an old Finnish hatchet he rehafted and restored last summer.

Then he made a few pegs with his puukko knife.

We secured the back of the lean-to to the ground with some pegs and then set up the front of the shelter by guying out the poles to pegs using a bowline knot and trucker’s hitch. A good basic shelter for a man and his gear.

Next up was fire prep. I felled a dead pine sapling, and Alex chopped it up into firewood.

I showed him a good place nearby for collecting birch bark. It was really wet, but I knew the oils it contains would still burn.

We also collected some dead lower spruce branches and brought them back to the camp site, where we used my Fiskars saw to break down some more of the pine and got to work splitting some of it up as well. I was using my BushProwler to baton some of the wood (you can see how soft and muddy the ground was by how the bolt stayed upright after just a few hits).

Here’s a shot I took of our camp before it got dark. Once again, I’m using the Holden tent.

It was a challenge getting the birch bark to light, but we managed to get it going and slowly built up our fire. We burned some of the pine and always kept our supply near the fire to help it dry out. Rather than getting all our wood from the forest, we cheated a little and took some from the barn. I guess this really makes it “backyard bushcraft”. 😉

Anyway, as you can see it was getting dark, and we were both hankering for some grub, so Alex made some hearty soup in a pot next to the fire and I made bannock in my pot suspended over the fire on a stick. A good way to prevent the bannock from sticking is to put a little dry flour on the bottom of the pot before putting in the dough.

A nice bonus of having a camping partner in the autumn and winter is the conversation. It gets dark pretty early in the north, and unless you have some kind of work you can do in low light, you’re going to have a lot of time on your hands after the sun goes down!

Before we hit the hay, I threw the rest of the wood on the fire, which burned for quite a while. Some of our firewood came from logs which used to be part of an old building, and you can see the notching on one piece in the picture below. We both noticed that it looked like a number 1.

The following morning, we arose and once again got to work splitting firewood. We were lucky for most of the morning, in that it rained only a little here and there (wouldn’t you know that the real rain would come 20 minutes before we had to break camp, soaking everything we had with us).

To make fire starting a little easier that morning, we used a piece of waxed-impregnated twine Alex had brought with him. It burned long and hot and helped to get the birch bark going.

Alex decided to try his hand at bannock for breakfast, so he mixed his dough in a plastic bag and put it into his pot. I cut up a package of bacon and started frying it in my pot over the fire.

Having gone through his water supply, Alex fetched some from the creek not far away.

When my bacon was ready, I threw in four eggs and put the pot back over the fire for a little while. Alex’s bannock wasn’t baking the way he had hoped, so he took it out of the pot and put the dough on a stick near the fire to rectify the situation.

After we ate, it started drizzling and then raining, so we quickly packed up our wet, muddy gear and hit the road. I was very happy to have Alex along on this trip and am looking forward to his first winter trip, which will probably be in a few weeks!

Initial impressions of the Skrama bush knife

Earlier this autumn, I brought your attention to a new knife designed by Varusteleka, a Finnish outdoor/military surplus supplier. The Skrama, which is made in Finland and available only from Varusteleka, is designed to be an all-around wilderness blade for campers, bushcrafters, woodsmen etc. After reading my short blog post, the company offered to send me a free sample of the knife in exchange for a review here at the blog. I accepted their offer and told them that I’d give the knife a good shakedown and a fair and honest review.

The Skrama came with a rugged plastic blade guard, but the company is also working on a leather sheath available separately.

Considering the interesting handle shape of this knife, I was curious to see how it felt in different grips. It felt very natural and comfortable however I held it. Incidentally, I think hard, non-sticky rubber was a good choice for the handle material. I also think the long handle will contribute to this knife’s versatility in use.

While I was trying out different grips, I noticed that the balance point lies right where the handle starts. This makes it easier to do finer cutting tasks, despite the large overall size of the knife.

Since one of the tasks I use a camp knife for is food preparation, I took the Skrama to the kitchen and tried it out on a tomato. After just a few cuts, I felt I had seen enough. 🙂

After cutting the tomato, I “decimated” a piece of printer paper with ease.

One popular, and practical, use of a good camp knife is throwing sparks off a ferrocerium rod for fire lighting. I found the best way to do this with the Skrama was to scrape the rod with the spine of the blade near the tip, since the section of spine near the handle would not throw sparks (this is easily remedied with a file). I used the ferro rod as a pointer in the picture below to show the part of the blade I used to scrape it.

So far, I’m impressed by the very rugged construction, good balance and out-of-the-box sharpness of the Skrama. Next weekend I’ll take the knife out to the forest to do some real testing. Stay tuned!

A meal in the late-autumn forest with my woodsman-in-training

In the Finnish language, November is “Marraskuu”, which literally means “death month”. I think it’s an appropriate name for this dreary time of year. I usually like to wait the month out because of the wet, cool and dark days and then resume outdooring when the bright winter snow has come for good, but I decided this year to stop that silliness! Looking at the month from a different perspective, I realized that it has advantages all its own. The cool weather means there are no mosquitoes, black flies, midges, horse flies or deer keds like in the summer, and since it’s not full-on winter yet, I don’t need the extra clothing, snowshoes/skis, etc. Besides, if you are lucky enough to be able to spend time out with people who are important to you, the weather doesn’t really matter that much in the end.

This winter, the Woodsboy (WB) will turn 5, the age at which sons “move from the sphere of women to the sphere of men” in some traditional cultures. I can understand why they picked this age. Eager to learn and having a sharp mind like a sponge, not to mention a greater level of maturity, I feel that the Woodsboy is ready to spend more time with me doing “real” outdoor activities. Fortunately, he has shown great interest in coming along and learning all he can. Besides being a chance to spend quality time together, our trips will allow him to pick up wilderness skills and knowledge, as well as an understanding of outdoor safety and good practice, from a young age so that they will be second nature to him later in life.

The first Sunday this November, the boy and I drove out to the old farmhouse woods for a meal and to explore the property some more. The first order of business was to set up the Holden tent for him, complete with wool blanket-insulated floor, his gear-filled backpack and plenty of outside toys. 🙂

As you can see, he elected to wear the blaze orange baseball cap (his “safety hat” as he called it), which left me with the orange vest. Instead of looking for standing dead wood for our fire, we decided to speed up the process and get some wood from the chaotic wood shed behind the barn and carry it back to the campsite.

Before splitting the wood with my axe, I had WB stand clear of the area and explained to him the potential dangers of sharp tools, flying wood chips etc. He stayed put at a safe distance and practiced some “splitting” of his own.

Once the wood was ready, I laid down two larger fuel wood pieces and put some shavings between them. WB helped me to put small fuel wood on top in a grid fashion, and we lit up the fire.

All throughout the process, I made it very clear that the fire was potentially very dangerous and that he was never to get too close to it, put anything on it or run around nearby it. Just like with sharp tools, I want the Woodsboy to have a solid understanding of the potential dangers of fire years before he is even allowed to work with it himself.

It was high time for some grub, so I gave WB a sandwich and some water and then set up a little rig for roasting mini-sausages over the fire. I prepped a stick to hold the sausages and laid it on the forked stick from my last trip. To keep the stick level, I put the other end through a knot-hole in one of the pieces of firewood.

While we were eating, WB said his sandwich was getting cold, so I stuck it on the same rig. 🙂

When the temperature started to drop and he felt cold, I set him up near the fire on his little folding-chair backpack with food on one side and water on the other. He had worked up quite an appetite and ate a banana and peanuts in addition to two sausages and a sandwich. 🙂

I also let him “roast” his sandwich by himself a little. 🙂

We packed up our stuff, let the fire burn down to coals and I then poured plenty of water on the remnants of the fire and told WB about why it’s so important to make sure it’s out completely before leaving.

By the way, I used the Swedish LK-70 pack for this outing because of its large capacity. It really comes in handy for day trips when you have to lug around extra stuff!

WB’s focus, eagerness to learn and good behavior during this trip were encouraging to me, so I’m really looking forward to our next trip out!

A long-burning nighttime campfire for cold weather

Lonnie (aka phreshayr) over at the YouTube channel Far North Bushcraft and Survival recently put out a great video showing how to make a very long-lasting nighttime campfire, which can be especially beneficial in cold weather. The fire he builds is known as a “rakovalkea” (gap fire) in Finland, and it is also known in the other Nordic countries. I really like Lonnie’s down-to-earth, no-BS style of making videos. He’s really knowledgeable about Alaskan bushcraft, and it shows in his videos. I plan on making one of these fires this coming winter, so stay tuned for that.

Hope you enjoy it!