(Belated) overnight trip report – March 21st/22nd

Toward the end of March, I spent a weekend exploring the old farm woods and the surrounding area, finally locating all the boundary markers of the property and discovering some other interesting features of the “neighborhood” as well. At that time, there was still a good bit of snow on the ground, most of which has since melted, and the temperatures were a lot lower, too, with about -5ºC/+23ºF during the day and -12ºC/+10ºF at night.

Before choosing a new campsite and setting up camp, I wandered around looking for the back property markers, taking some pictures as I went along.

I found a nice, reasonably flat spot at a far corner of the property and set up the MIL-TEC tarp in my beloved Holden tent configuration. So far, I’ve been very pleased with this tarp, which I bought a little over a year ago.

Once my camp was set up, I located some potential firewood nearby. Besides a few smaller dead pine saplings, I found a nice larger dead pine which had partially fallen over some time ago. Getting a hung-up tree like this unstuck can be very dangerous, so I’m not going to give instructions on that there. All I will say is that it’s a good idea to read up on the subject and have an experienced tree feller go out into the field with you to show you how to do it. In general, though, the idea is to first cut the tree at the base and then carefully move up the trunk, cutting section by section, until it can be freed from the other tree.

I cut the trunk into campfire-sized pieces and also collected the dry branches from the top of the tree.

To ignite the dry branches, I would need something finer and easily flammable, so I went back to an area where I had remembered seeing lots of birch bark on the ground. This bark had been stripped off some trees when the loggers came through to thin out the forest last year.

After splitting up some of the sections of the pine tree I had dislodged and sectioned, I laid down some lower-quality, partially rotten pieces of wood in the spot I had chosen for the campfire. On this I placed a piece of birch bark, which I scraped with my BushProwler knife from Ilkka Seikku to create a fine pile of paper-thin shavings to ignite with my ferrocerium rod. I then added progressively bigger pieces of wood until the fire was ready for me to start heating up some food.

Once I had eaten and relaxed a bit, I decided to spend the evening exploring the area some more.

Plenty of animal sign:

Curiosity led me to climb some of the higher hills in the area, which rewarded me with a really nice view. First, looking down at my campsite:

This was followed by a short hike down to the lake, where I plan to do some fishing this season.

After hiking around, I sat by the fire for a long while, ate some dinner and watched the stars appear one-by-one as the sky darkened to night. I slipped into my nested sleeping bags in my poncho bivy and continued watching the sky through the doorway of my tent until I drifted off. After a good night’s rest, I arose in the morning, shook off the sleep and started the morning fire. Once again, I dined on Finnish rice pies (riisipiirakka) and a meat pie (lihapiirakka). I also boiled up some water for instant coffee in my Swedish mess kit lid.

Wanting to take advantage of being in the neighborhood, I packed up camp and hiked back to the cabin site, where I spent the rest of the afternoon working on the future homestead.

Hope you enjoyed this quick overnight trip report. Stay tuned for more!

Building a permanent bushcraft camp – Part 1

Something that I’ve wanted to do for the past few years is to build a permanent bushcraft camp. For one reason or another, be it due to other plans or a lack of time, I never got around to it. The general idea was to create a long-lasting permanent camp, including a shelter, fire pit area, cooking facilities, storage/firewood area, crafting area and more using a minimum of tools and modern materials and getting most of what I need from the forest around me. Last weekend, I headed out to the country property I’ve been visiting so I could finally get started with the project. As it progresses, I hope not only to create a “woods home away from home”, but also to improve my skills and knowledge in the process!

First off, a picture of the site I picked for the camp. Nothing special, just a little opening surrounded mostly by spruces.

The most labor- and material-intensive structure at my new camp would be the shelter. I did a lot of thinking about just what kind of structure I wanted to build and ultimately decided on something that combines elements of several shelter types I’ve seen. Over the course of this series of posts, you’ll see what I came up with, but I won’t be divulging all my plans now. 😉 For my shelter, I was going to need a good number of strong straight poles, so I was in luck that the forest nearby was in desperate need of thinning. It was so clogged with young spruce trees (some of which had already died due to a lack of sunlight) that it was difficult to walk through.

Now, as most of you know, I purchased a Swedish military surplus axe recently for work just like this, among other things. It was in such great condition that I didn’t have to do much more than scrub off the surface rust and marks from the handle. I spent about 1 minute with a sharpening stone getting it into shape and also impregnated the leather sheath with wax. Some before and after pics:

I was very eager to try this axe out in the woods. Of course, I brought my regular axe with me as well, because you never know how well a tool is going to perform (or fail) until you use it. As you can see, it was wet that day.

I decided to look for three solid poles on the thicker side to serve as a base tripod for my shelter, so I searched the area and felled them with my axe. I made sure to pick out trees which were being crowded out by or competing with other trees for sunlight. After just a few chops, I could detect a tiny bit of movement in the head. I decided to continue using the axe cautiously to see how things went. After being sunken in wet snow repeatedly, the handle absorbed some water and the head tightened right up. It didn’t budge in the slightest after that. I’ll be sure to soak it in linseed oil to rectify this situation properly. Here are the tripod poles I cut:

I don’t know what this particular type of lashing is called, but I have used it several times. First, you wrap the cord tightly around your poles four or five times and tie it off. Then, you tightly wrap the cord around itself between the poles several times and tie it off each time here as well. This gives you a solid tripod.

Following this, I spent several hours using the axe to fell and limb more spruce saplings and cut them to size. I was happy to find that the axe was not fatiguing to use one-handed for long periods of time, despite its overall weight of 1.6 kg (3.5 lbs). It bit deeply into the wood, was accurate and retained a sharp edge. It took very little for me to become accustomed to using the axe, as I’ve been using a 3/4 axe regularly for several years now. The main difference is the greater weight of the new axe, which I didn’t notice most of the time.

After the first round of trees had been processed, the shelter started to take shape:

I realized that the entire shelter project was going to take longer than I thought, and knowing it would get dark soon, I called it quits in order to look for firewood for cooking and heating that evening. I found a dead standing pine on a rocky hill nearby and felled it with the axe in no time. It had a base diameter of about 11 cm (4.25 inches), so nothing huge. I bucked it into three logs and carried them all back to my camp, where I cut them to length and split a few of them to get a fire going.

For kindling, I split some some of the smaller pieces of wood and made some feather sticks with the Marttiini Kaamosjätkä knife I modified years ago and showed here recently. I found that I enjoyed using a smaller knife like this for a change. 🙂

By the end of the first day, I had made good headway on the shelter, procured myself some firewood and made myself a spruce-bough bed from all the limbs I had cut off the poles. The camp was starting to take shape.

Before I called it a day, I threw my new tarp on the pole frame, tied it down in a few places, and then put my sleeping bag and bivy on top of the bough bed. I didn’t even bother to get out my self-inflating sleeping pad, which I ended up not needing, as the spruce boughs provided plenty of insulation.

As the sun began to set and bathe the trees around me in a beautiful golden glow, I felt I had received some kind of reward for the day’s work, but it was only the first one. After nightfall, the clear sky provided a beautiful view of a bright moon and countless twinkling stars. The moon lit up the snowy forest so brightly that I didn’t need a headlamp or flashlight to see. I arose bright and early in the morning, looking forward to breakfast. First, though, I’d have to put together a rig to hang my pot from. I cut three suitable spruce poles to length and tied them together in a similar fashion to the shelter tripod, except that I only wrapped the cord around all three one time.

From the hinge, I hung a length of cord to hold a notched stick, which would in turn hold my cooking pot. Doing it this way keeps the cord from getting too close to the fire.

Although I had not done as much as I had hoped that weekend, I was pleased with what I had accomplished. The shelter was coming along nicely, and the cooking area was shaping up, too. Here’s the current status of my permanent bushcraft camp:

Before I went home, I stopped by the old farm house to take another look at the old knives I had found there, as I wanted to see if any of them were worth restoring. I was in luck! The vintage KJ Eriksson Mora knife, although a bit worn and rusty, was still very solid.

The following day, I spent my lunch break getting the knife into usable shape. Rather than completely refurbishing the knife and making it look like new, I decided to go a different route and let the vintage-ness of the knife come through. I scrubbed the blade and bolster with a plastic scouring pad and lemon juice to get the rust off and create a nice patina. Next, I scrubbed and then scraped the handle to remove as much of the red paint as possible. Finally, I slowly ran the handle over a candle flame several times to darken the wood and then soaked some wax into it to waterproof it. I’m pretty happy with the results and am planning on making a simple belt sheath for it after I procure some leather. By the way,  I think this is the only Mora knife I’ve personally seen that has a leather washer between the handle and bolster. It’s a nice touch!

Hope you enjoyed this first look at my permanent camp!

Field testing the Skrama bush knife

A few posts ago, I gave you my initial impressions of the Skrama knife from Varusteleka. Cutting tomatoes and paper is all well and good, but it’s not a useful indicator of what an outdoorsman’s blade can do, so I drove out to the country the first weekend of December to do some real winter woods testing of the Skrama.

The temperature was about -3°C/26.5°F that Sunday. Not exactly a frigid North Pole winter day, but below freezing nonetheless. The scenery around the property invited me to photograph it, so I’ll show you some of my surroundings first.

Once I had found a good spot to do the testing, I put down my pack and took out…unleashed, if you will…the Skrama. 😉 I decided to test its chopping abilities first and located a live hardwood sapling and dead pine sapling for the tests. The live hardwood sapling fell after six easy blows. The dead pine sapling took a few more swings, on account of its being seasoned and hard. I liked how the blade cut deep without using excessive force. I found that I naturally choked all the way down on the handle for this heavier chopping and preferred to chop with the middle of the blade. At no point while chopping was there any uncomfortable vibrating of the handle which can occur with some large knives.

After chopping down the saplings, I dragged them to an open spot on a small hill to continue my testing there. I wanted to turn the pine into firewood, so I sectioned it into manageable pieces with the bush knife. Three or four chops around the circumference and a swift kick were all that was needed to break off each piece. The thinner pieces broke off without a kick.

The next step in my firewood prep was splitting, but instead of using just another section of the pine to split with, I thought I’d use the Skrama to make a baton out of part of the hardwood sapling. After chopping off a section, I choked up on the handle to just below the blade and used light, controlled blows to carve out a handle. The great balance of the knife made it easy to be very accurate while doing this light chopping.

Then I whittled the handle down a bit further to smooth it out. The Skrama is obviously not a carving knife, but it’ll do the trick for “camp implement” carving.

Now that my baton was ready, I could commence splitting. I was very pleased with how readily the blade went through the wood, and the knotty section at the bottom barely slowed it down. I liked that I didn’t have to be afraid to beat on the knife while batoning, something you have to be careful about with less-robust knives.

The final step in one-stick fire prep (for me), is to make shavings/feather sticks, so that’s what I did. As you can see, the Skrama got the job done well enough. Again, fine work is not something I’d want to do all day with this knife, but to be honest it’s not really built for that anyway. It’s good to know that it can do it, though!

Out of curiosity, I experimented with this blade as a drawknife of sorts for removing bark from the hardwood sapling. It excelled at the task.

Being a large-bladed knife with a long handle, the Skrama is just begging to be used for slash cutting/machete work, at least in my mind. I dispatched a few hardwood seedlings in the area with one easy swipe each. I know which tool I’ll be using next year to clear the willow seedlings and saplings from the fields on the other part of the property!

My final test of the day was going to be some finer carving using the tip of the blade. I came up with an idea for a cooking rig and started working on it when a photo blogger’s nightmare came true: My camera died. Not just the battery, but the camera itself. When I turned it on, the telescopic lens would not come out. Well, that was that for picture taking. I made an “arrow nock” in the end of a large forked stick, and the tip of the Skrama pretty easily handled the finer work for this end notch.

Before putting the knife away for the day, I quickly checked to see how the edge had held up. It was still surprisingly sharp, though I might touch it up a bit if I want to cut any more tomatoes with it. 😀 I think this shows that Varusteleka/Laurin Metalli did a very good job with the heat treat and sharpening of the knife.

Conclusion

The Skrama is a great chopper of both seasoned and green wood, splits and slash-cuts impressively and can do finer work as well, though I’d probably want to pair it with a much smaller knife if I have a lot of smaller work to be done. The handle does allow for a variety of different grips and holds, which aids in the knife’s versatility. One thing I was surprised about while using the knife was that there was little need to “get to know” the knife, in other words, to work with it for a while to figure out how to use it best. This shows the thought and effort that went into its design. Because of the Skrama’s solid construction and materials, I was not afraid to use it roughly, toss it in the snow etc., and there was no danger of it slipping out of my hand thanks to the handle’s material and texture. By the way, this knife is full tang (the metal ring on the bottom of the handle is an extension of the tang).

In my opinion, the Skrama lives up to its claims as being a rugged, multipurpose wilderness blade, and then some. I would not hesitate to recommend this knife to someone looking for a solid tool for a variety of uses and situations.

While collecting info on the Skrama, I went back to Varusteleka’s website and saw that the leather sheath they designed and make for the knife is now available and that the knife itself is currently on sale for €55.25 ($75 USD) until this coming Sunday, December 15th.

¿Qué te gusta el bushcraft?

With temperatures dipping down to -10*C (14*F), but occasionally still rising a little above freezing, and with several centimeters/inches of snow already on the ground here in eastern Finland, we are on the cusp of real winter beginning. Soon the temperature will no longer peek above the freezing point until sometime in March, and the snow will have accumulated to well over a meter (over 3 feet) by that time. Before I switch to full-on winter mode, though, I wanted to write one more blog post about some doings of this past fall.

Almost a month ago, I headed out to the country property I’ve been visiting for the last pre-winter overnighter of the year. This time, I had the pleasure of being accompanied by a new friend who I met this past summer. Alex is originally from Spain, but lives not too far away from us and moved here about the same time we did. He’s very interested in learning about bushcraft and woodsmanship, and I am happy to share the little I know with him. He dropped by the weekend before Halloween to show me some bushcraft and camping gear he had been accumulating over the past few months, and we started planning an autumn overnight trip which would take place 2 weeks later.

The weather that weekend ended up being very wet and cool. It rained on and off, and our camp looked like a mud pit by the end of the trip. I was seriously wondering if the crappy conditions would turn Alex off to the idea of camping and bushcraft outside of summertime, but this wasn’t the case at all. Anyway, we drove out to the property and went straight to the campsite I’d been visiting somewhat regularly lately. Alex got to work right away collecting poles for his lean-to using an old Finnish hatchet he rehafted and restored last summer.

Then he made a few pegs with his puukko knife.

We secured the back of the lean-to to the ground with some pegs and then set up the front of the shelter by guying out the poles to pegs using a bowline knot and trucker’s hitch. A good basic shelter for a man and his gear.

Next up was fire prep. I felled a dead pine sapling, and Alex chopped it up into firewood.

I showed him a good place nearby for collecting birch bark. It was really wet, but I knew the oils it contains would still burn.

We also collected some dead lower spruce branches and brought them back to the camp site, where we used my Fiskars saw to break down some more of the pine and got to work splitting some of it up as well. I was using my BushProwler to baton some of the wood (you can see how soft and muddy the ground was by how the bolt stayed upright after just a few hits).

Here’s a shot I took of our camp before it got dark. Once again, I’m using the Holden tent.

It was a challenge getting the birch bark to light, but we managed to get it going and slowly built up our fire. We burned some of the pine and always kept our supply near the fire to help it dry out. Rather than getting all our wood from the forest, we cheated a little and took some from the barn. I guess this really makes it “backyard bushcraft”. 😉

Anyway, as you can see it was getting dark, and we were both hankering for some grub, so Alex made some hearty soup in a pot next to the fire and I made bannock in my pot suspended over the fire on a stick. A good way to prevent the bannock from sticking is to put a little dry flour on the bottom of the pot before putting in the dough.

A nice bonus of having a camping partner in the autumn and winter is the conversation. It gets dark pretty early in the north, and unless you have some kind of work you can do in low light, you’re going to have a lot of time on your hands after the sun goes down!

Before we hit the hay, I threw the rest of the wood on the fire, which burned for quite a while. Some of our firewood came from logs which used to be part of an old building, and you can see the notching on one piece in the picture below. We both noticed that it looked like a number 1.

The following morning, we arose and once again got to work splitting firewood. We were lucky for most of the morning, in that it rained only a little here and there (wouldn’t you know that the real rain would come 20 minutes before we had to break camp, soaking everything we had with us).

To make fire starting a little easier that morning, we used a piece of waxed-impregnated twine Alex had brought with him. It burned long and hot and helped to get the birch bark going.

Alex decided to try his hand at bannock for breakfast, so he mixed his dough in a plastic bag and put it into his pot. I cut up a package of bacon and started frying it in my pot over the fire.

Having gone through his water supply, Alex fetched some from the creek not far away.

When my bacon was ready, I threw in four eggs and put the pot back over the fire for a little while. Alex’s bannock wasn’t baking the way he had hoped, so he took it out of the pot and put the dough on a stick near the fire to rectify the situation.

After we ate, it started drizzling and then raining, so we quickly packed up our wet, muddy gear and hit the road. I was very happy to have Alex along on this trip and am looking forward to his first winter trip, which will probably be in a few weeks!

A long-burning nighttime campfire for cold weather

Lonnie (aka phreshayr) over at the YouTube channel Far North Bushcraft and Survival recently put out a great video showing how to make a very long-lasting nighttime campfire, which can be especially beneficial in cold weather. The fire he builds is known as a “rakovalkea” (gap fire) in Finland, and it is also known in the other Nordic countries. I really like Lonnie’s down-to-earth, no-BS style of making videos. He’s really knowledgeable about Alaskan bushcraft, and it shows in his videos. I plan on making one of these fires this coming winter, so stay tuned for that.

Hope you enjoy it!

First hiking and bushcraft trip to the cabin woods

On Sunday afternoon, I drove out to the property with the old cabin we’ve been working on restoring. Instead of doing work on the building, though, I wanted to explore the area around it. Fortunately (for me), we got our first snow of the season the day before, so I was able to enjoy a little early taste of winter. Also fortunately for me, the weather played along nicely!

I parked the car near the cabin, took some pictures of the fields and woods on the property and then explored the woods adjacent to the property.

There’s a small cliff at the back edge of the property and a stream at the bottom.

I spotted these (probably fox) tracks nearby.

Frozen moose dumplings:

Bunny tracks:

Being that it’s moose-hunting season, I wore my blaze orange vest for safety’s sake. At this time of year, I usually wear either an orange hat or vest like this in potential hunting areas (though I make a conscious effort to NOT disturb hunters’ hunts with my doings).

After hiking around with my pack for about 2 hours, I returned to the property and picked out a nice level and open spot to set up a tarp shelter (more on this shelter type in an upcoming post). For a ground cloth, I used a heavy-duty garbage bag, and on top of that I put my pack and a small foam pad. The woods nearby provided a dead standing pine sapling, which I chopped up into firewood.

As a side note on the shelter, I added a loop at the middle of the long side of the tarp because there were no grommets there. As you can see, I reinforced the tarp in that area with black repair tape and stitching.

The temperature at the site was about -1ºC (30ºF) at the time, and by the evening had dropped to -3ºC (26.5ºF).

Not having my grill with me, but needing some way to keep my pot over the fire, I found a small sapling and made a stick with a fork on one end and a point on the other.

Then I cut down a larger and heavier sapling, stripped off its branches, carved a notch near the end (for the pot bail) and laid it on the forked stick stuck in the ground. The weight of the far end of the sapling meant that I didn’t need to do anything else to keep the “pot end” up.

Now that my cooking rig was ready, I needed to gather some tinder and split some of the pine for the fire. I found a birch tree nearby with some great bark peeling off it. It was like paper and had a nice feel to it.

Dinner for the evening was pasta in cheese sauce, which is a nice way to say “mac n’ cheese” ;)…

…and bannock, aka stickbread. After I added water to the dry mix, I put the dough ball down for a minute or two to do something and then found that it had already started to harden because of the below-freezing temperature outside!

It took longer than normal, but I managed to squeeze the dough into a strip and wrap it around a stick to bake near the fire.

As it started to get dark, I ate the bannock and drank some water and then packed up most of my gear. Here’s one last shot of the tarp tent at dusk. Normally, I put the fire a little closer to the shelter if I’m going to use it for warmth on an overnight stay.

Finally, I’d like to talk a little bit about “bushcraft gear”, specifically the price of said gear. Almost every item you see in this post was either a discount store item, military surplus item, consignment shop fixer-upper or recycled. The only exception is my BushProwler knife, which was hand made to my specifications (though cheaper Mora-type knives etc. would certainly also suffice). Here’s a little rundown:

  • Shelter: 2 Euro ($2.60 USD) tarp from hardware store, pole and pegs from old tent
  • Pack: 25 Euro ($32.50 USD, cheaper in the US) Swedish LK-35 military surplus
  • Axe: 10 Euro ($13 USD) from consignment shop, rehafted and fixed up by me
  • Pot: 5 Euro ($6.50 USD) from discount store
  • Spoon: Taken from a cutlery set from my cub scout days
  • Kuksa cup: 4 Euro ($5.20 USD) from consignment shop (boiled before use)
  • 1 liter aluminum water bottle: 1 Euro ($1.30 USD) from consignment shop
  • Sitting pad: 1 Euro ($1.30 USD) from discount store
  • Garbage bag ground cloth: A few cents
  • Matches: A few cents a box, housed in a birch bark container I made
  • Knife: Let’s say I used a Mora instead: 10 Euros ($13 USD)
  • TOTAL: 58 Euro ($75 USD)

My suggestion when looking for gear is to shop around, see what you can make using things you have at home, trade with other people, recycle things other people are planning on throwing away etc. Outdoor gear does NOT necessarily have to be expensive!

Lemmenjoki National Park, Lapland, September 2013 – Part 2

In case you missed it, Part 1 can be found here.

Pasi and I had spent Monday night at the Vaskojoki hut, which is open to wilderness travelers on a first-come, first-served basis and provides bunks with mattresses, a wood-burning stove, a table and benches and even a gas cooking stove.

The scenery around the hut wasn’t too shabby.

Following breakfast, we packed up our gear and said adieu to the Vaskojoki hut, traveling roughly along the Vasko River looking for a suitable place to cross it. The wetter land between the river and drier pine forest was often covered with scrubby birch trees.

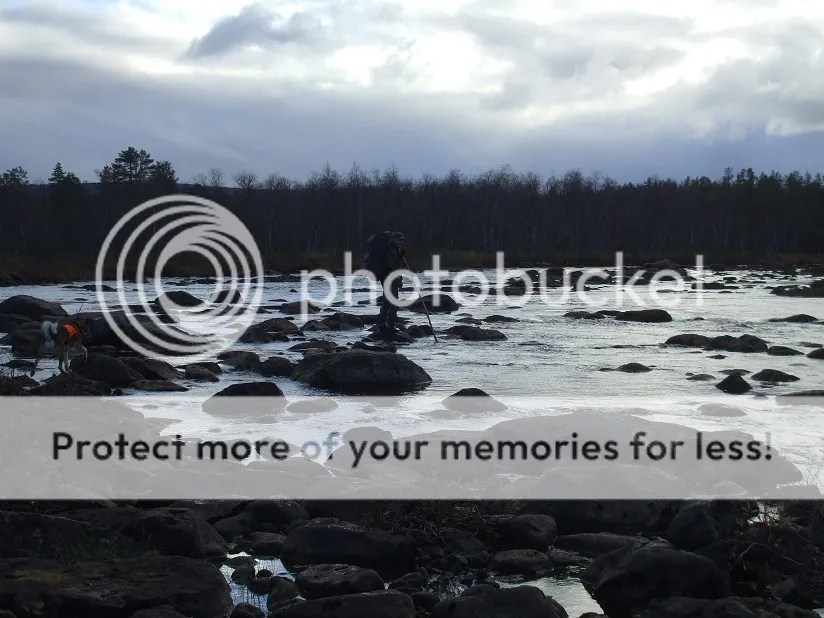
Here’s Pasi testing a route across the river.

Our prospects didn’t look good at that location, so we headed to a higher elevation and traveled through the pine forest again. A sight often encountered throughout these forests was reindeer droppings, aka “nature’s licorice jellybeans”. They are much smaller and darker than moose droppings.

Speaking of moose, while Pasi and I stopped to take a short break, I spotted a cow moose plodding through the forest not too far away. She obviously didn’t smell or hear us, for she carried on with her business for quite a while. Unfortunately, the best picture I could get of her was this (she’s the brown blob in the center):

As we continued hiking parallel to the river, we came across this kota/lavvu frame. For those of you not familiar with this type of shelter, it is similar to the tipi used by Native American Indians. In Lapland, they are primarily used by the indigenous Saami people/Laplanders.

Our route toward a narrower and rockier section of the river where we might cross more easily took us over some very marshy ground. Good thing I was wearing rubber boots! A few scenes from along the way:

An old bird’s nest:

Parts of the forest were littered with scraggly dead pines like these.

Some of the marshy areas were full of dwarf birch, the leaves of which had either turned brown or fallen off by that point.

When we cut over and approached the river again, we looked for a suitable place to stop for a meal and thought this area would do.

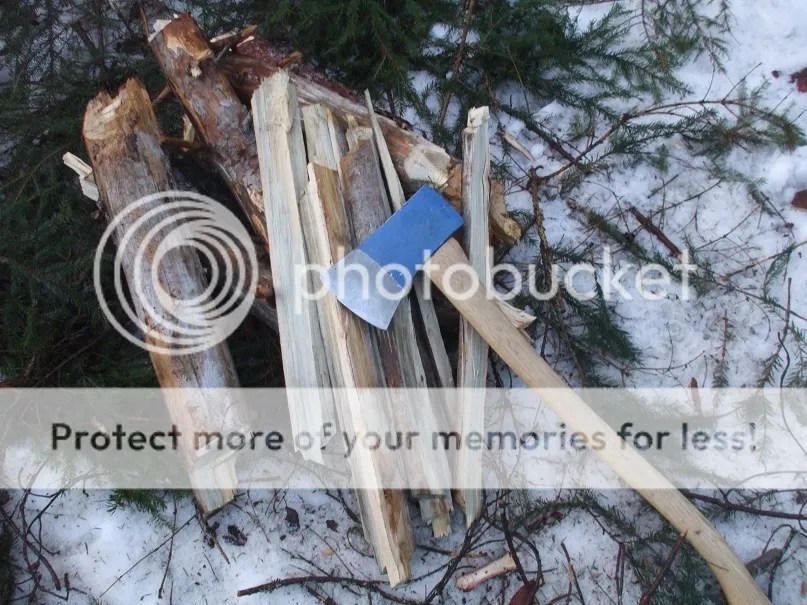
While Pasi got a fire going in a fire pit used by previous hikers, I collected firewood from a dead pine nearby with my Fiskars large sliding saw.

It was a fine spot for a meal indeed. 🙂

From time to time, the clouds broke, giving us a glimpse of beautiful blue sky.

Following our meal break, we threw on our packs and headed southward away from the river and through the pine forest to a lake where we’d make camp. We saw these moose rubbings along the way. When a bull moose is regrowing antlers in the spring and summer, they’re covered in a fuzzy layer of skin called velvet which the moose rubs off once the antlers stop growing. They often use saplings like this for the purpose.

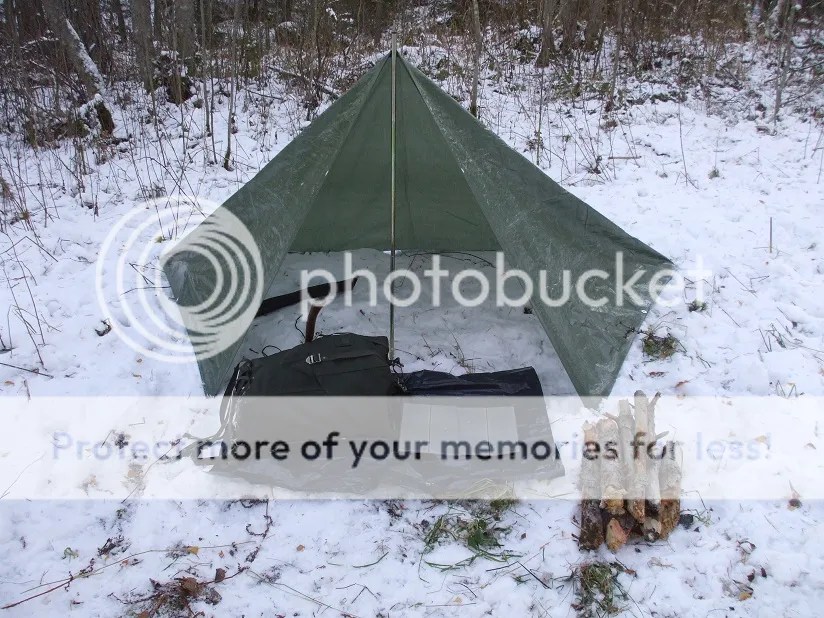
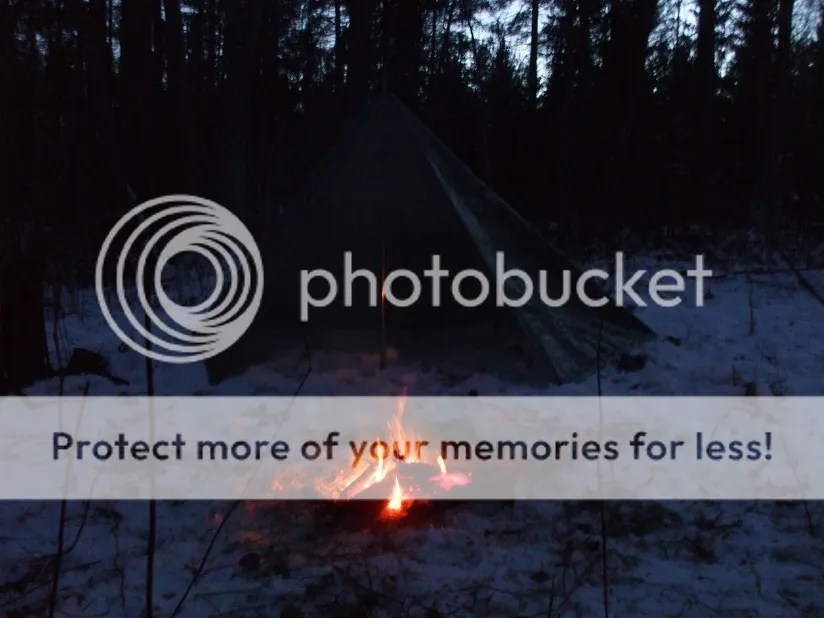
We reached the small lake, which was linked to the river by a stream, and set up camp before it got dark. We followed the usual drill of setting up our shelters and a stone fire ring and then collecting firewood. Pasi’s shelter on the right is a “pena-laavu” from the Savotta company, and my shelter on the left is two German army surplus ponchos snapped together in a brew shelter configuration. I wasn’t able to set up my shelter perfectly because of the trees nearby, but it worked well enough.

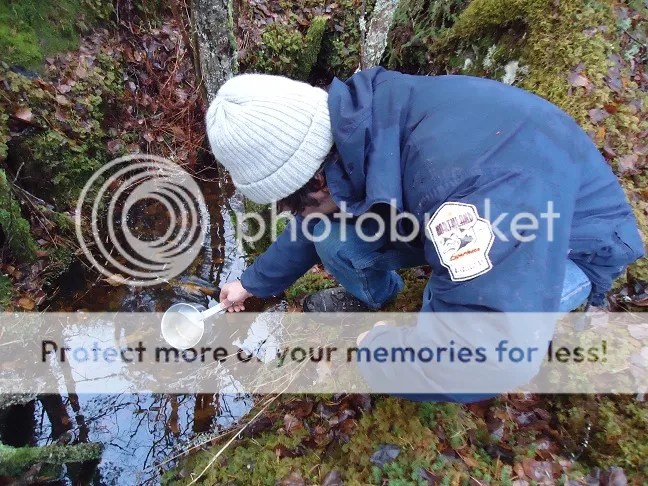
The water we got from the lake was crystal clear and delicious. Just dip your cup in and drink. 🙂

In all, we had hiked about 9 km/5.5 miles on Tuesday, and I was eager to hit the sack as soon as night came. Pasi arose earlier than I for some morning capercaillie hunting with his laika Pyry. I awoke to Pasi shouting at Pyry some distance away in an effort to stop him from chasing a moose, which can lead to a long sit-and-wait or retrieve-your-dog-from-deep-in-the-wilderness scenario. Pyry complied and I fell back to sleep. A bit later I woke up again and started up the fire after collecting more wood. While fiddling around, I heard a nearby shotgun blast from the otherwise silent forest, and Pasi returned with the second capercaillie of the trip, another male, which was older and more substantial. He related his brief encounter with a bear that morning as well as his intention to return to the area for a bear hunt in the future.

After Pasi had finished unburdening the fowl of its internals, we sat down to cook a meal over the fire. He had remarked that the temperature dropped below freezing overnight, at which time I remembered noticing this at some point during the night. Not long after, we got a little confirmation from mother nature in the form of a 5- to 10-minute period of wet snowfall…quickly followed by sunshine.

Out of curiosity, I took out my thermometer to take a reading. Just as the weather report had forecast, it was 4°C/40°F. As a side note, I used the Swiss sleeping bag and sleeping bag liner on this trip and never felt cold.

We then packed up and headed down to the river again to search for a good spot to cross. We cut ourselves some poles from the nearby woods, and Pasi skillfully led the way across.

With my luck being what it is, I’m sure you can guess what happened when I traversed the cold river, stepping from one slick rock to another. 🙂 Yes, yours truly fell in, filling my boots with water and getting wet almost up to my waist and wetting the front of my jacket and my gloves as well. Fortunately, the water wasn’t deep there. I picked myself up, wrought myself out and continued across the river. After quickly changing socks (my pants dried surprisingly quickly, so I left them on) and dumping the water out of my knife sheath, we continued hiking on the other side of the river toward our pick-up point, but not before I slipped on a boulder at the edge of the river, landing on my kuksa (the one I got from the Woodsbabe’s grandparents last Christmas). I had attached it to the shoulder strap of my pack with a carabiner for easy access, but never expected it to serve as an emergency cushioning device. Let’s just say I’m happy I landed on this cup with one of my cheeks and not straight onto the boulder with my tailbone… While it was unfortunate that this gift was rendered unusable, I’m sure the Woodsbabe’s grandparents would be happier knowing it broke while on a wilderness trip in Lapland as opposed to sitting on a shelf collecting dust!

The rest of our time in the forest was uneventful. We traversed some more marshy land near the river and eventually reached the pick-up point, where Pasi’s girlfriend was waiting for us. That evening, the three of us drove out to their cabin further to the north. Pasi intended to paint the new shed he put up there, and I offered to help. It ended up raining all Wednesday night and Thursday morning, so we scrapped the idea, instead returning to their home. That afternoon, they cooked my favorite Finnish dish, “käristys”, with moose meat (reindeer is often used as well). To make käristys, partially frozen meat is cut into thin slices and then slow-cooked with onions in butter over low heat. It’s then usually served with mashed potatoes and cowberries/lingonberries. Pasi used a leuku he made to slice the moose meat. The meal was delicious.

A while after eating, we three drove to the Siida Saami Museum in the village of Inari, which had very interesting exhibits covering Saami history, culture, handicrafts and technology, including an open-air section which I’ll cover next time. The museum also had plenty to show and tell about the geology, fauna and flora of the region.

Bidding my gracious hosts farewell on Friday morning, I retraced my 12-hour train and bus route of almost a week earlier and returned safe and sound (and a little sore) at home. Despite the issues of this year’s trip, I’m already looking forward to my next trip to the north (for which I will definitely be better prepared). As per usual, I’ll use this experience to make future trips more successful and enjoyable!

I want to say thanks to Pasi for being a great wilderness companion, showing me around “his neck of the woods” and for being patient and flexible. He really added a great dimension to the trip. I’d be happy to join him for another in the future (in better condition, of course ;))!