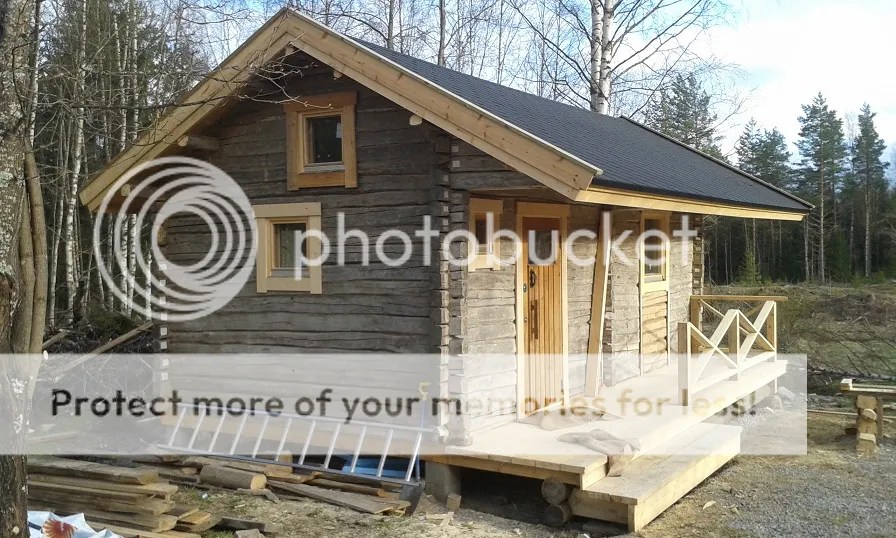
RSS

A trip to the lake – Part deux

First, a bit of a clarification: In my last post, I identified these as “young bilberries”.

In fact, these young bilberries are so young that they’re still flowers. :)

Now on to the weekend trip. I was planning to do a quick overnighter on Saturday night, so I gathered together my shoulder bag, cutting tools and bedroll (sleeping bag, sleeping pad and bivy bag). This setup is plenty enough gear for an overnighter or even a weekend trip, but does not include most of my cook kit and other items which are good to have on multi-day trips. Though I usually don’t care too much about exactly how much my gear weighs, I thought it would be interesting to weigh it. I was also planning to fish with my simple angling setup, so I included it as well. The total weight, without food and water is 6.3 kg/13.9 pounds (my hatchet, knife and belt pouch are in the shoulder bag).

When the Woodswife mentioned the idea of spending the weekend at the cabin with her parents, I thought that’d be a good alternative to a solo camping trip, so I decided to save the overnight trip plans for another time.

Naturally, the Woodsboy and I wanted to start fishing right away when we got there. We found a small worm under a rock, threw our line into the water and caught this right away.

It’s not uncommon to catch small perch using this method. The Woodsboy studied it closely.

We carefully released the fish back into the lake.

Meanwhile, grandma was cooking up some tasty meat treats on the “muurikka”, which you could say is kind of like a Finnish wok. ;)

After we ate, it was time for the little one’s nap, so I started fishing again by myself. I caught six or seven roach using bread, which I squeezed into little balls and threaded on the hook. Most of the fish were pretty small, but I also got this fat boy, which was about three to four times the size of most of the others.

Something then possessed me to practice some primitive skills, so I decided to try making cordage from natural materials. I was hoping that watching all those bushcraft-related YouTube videos would have left some kind of mark in my brain (fortunately, they did :) ). First, I located a willow shoot.

Then I made a slit through the inner and outer bark, down to the wood.

I carefully peeled off the bark.

Then I separated the inner and outer bark.

This was followed by cutting the inner bark into strips.

The next step was to twist one of these strips over its entire length, until it wanted to kink (forgot to take a picture of this). I allowed it to kink (which became the end of the cord), while continuing to twist the two strands. The way I did this was to roll the strands on my leg with my fingers and palm.

When I was finished making the short piece of cord, I tied off the end. It’s not long, but I think it’s OK for a first try.

I tested its strength by pulling on it until it broke. It was surprisingly strong. Later on, I made a slightly longer piece.

I was pleased to find that making cordage like this is really easy. I don’t think it will replace my paracord anytime soon, though. ;)

In my last post, I mentioned that I applied a few coats of teak oil to the handle of the Marttiini leuku I just restored. I think it came out OK.

That evening, we had a nice steam bath and then collapsed into bed. Perfect way to end a day!

In the afternoon of the following day, I felt like looking for some more spring/summer wild edibles and found these spruce shoots.

I also found this fireweed (epilobium angustifolium). The leaves and stems are edible (Note: Consuming wild edibles is done AT YOUR OWN RISK).

In addition to eating a bit of the spruce shoots (not my favorite) and fireweed leaves (much more palatable), I also ate some dandelion leaves, clover leaves, birch leaves, usnea lichen and cladonia lichen. After this “bushfeast”, I thought it’d be fun to try fishing in the small pond in the woods, so I grabbed my gear and headed out. On the way, I stopped at my campsite to clean it up a bit. As I mentioned before, we’ll be moving soon, and I won’t be visiting that particular site too often.

The area looks a lot different in the spring/summer, eh?

While there, I wanted to test my leuku a little more, so I chopped through this seasoned pine log, which was between 6 cm/2.5 inches and 7.5 cm/3 inches in diameter. I also did some batoning/splitting with this knife to see whether my epoxy repairs from last weekend did any good. Fortunately, the handle bolster did not loosen up again as a result of the batoning, so it seems the repair was a success. The knife’s edge seems to be retaining its sharpness nicely as well.

Over at the pond, I threw out a bread-baited hook and waited patiently.

There were a few taste-test nibbles, but nothing like at the big lake. This wasn’t a surprise, because I was previously told that there aren’t any fish in that pond, apart from a few pike which were stocked there several years ago. Only once did the bobber dip fully below the surface of the water, but I didn’t hook the fish. I’ve found that pike don’t usually respond to this kind of fishing, so either there are some other types of fish in there, or maybe a baby pike was curious about the bread ball that plopped down into his home. In any case, I’m very curious to know what’s going on there. I was really hoping to catch the “mystery fish”, but I was out of luck. As a matter of fact, I was out of blood, too, as the area around the pond was thick with mosquitoes and black flies. Unfortunately, my mind was still in “winter mode” and I had forgotten my bug net shirt. After a while, I couldn’t take the biting and buzzing (despite wearing “Eu d’Off” cologne), so I surrendered. It was time for me to head back to the cabin anyway.

With temperatures in the low 20s*C/low 70s*F, it finally feels like summer has arrived. I can’t think of a better way to have spent the weekend. I have to admit that I’ll miss the visits to this cabin and woods when we move to southern Finland, but on the other hand, I’m looking forward to many upcoming hiking, camping and fishing trips at the national parks and natural places in that area. In addition to the kind of things I’ve been showing you up until now, you can also expect to see backpacking-type trips more frequently after we move.


Tags: , , , , , , , , ,

An afternoon at the lake with the Woodsboy

Now that spring is really springing here in eastern Finland, I’ve been itching to get outdoors to enjoy the nice weather and do some gear testing. So on Sunday afternoon, with the Woodsboy in tow, I drove out to my mother-in-laws cabin at the lake.

I first started looking for more spring wild edibles. The best time to eat birch leaves are when they are young and small like this. They’re tender and fresh.

I brought out my newly refurbished Marttiini leuku to take it for a test spin (glamor-shot alert!).

It sailed right through some small willow shoots (sorry for the blurry pic).

Easily chopped through some wet-ish, but still very solid, dead birch.

The Woodsboy asked if we could do some fishing, so I put the knife away and headed over to the lake shore. On the way, I snapped this picture of some young rowan leaves.

And some very young bilberries.

In one of my earlier posts from last autumn, I showed the telescoping fishing pole and two pre-packaged hook, line, sinker and bobber rigs I had purchased.

In Finland, it’s possible to fish with equipment like this without a license and just about anywhere you want (there are a few restrictions). Fishing with a rod and reel using lures is a different story. Anyway, up until this past weekend, I hadn’t done much with my new fishing gear. I noticed that the pre-packaged line rigs I bought were kind of low in quality, but you get what you pay for. So earlier in the week I decided to make my own line rigs using better-quality materials which I had in my tackle box, as well as a small package of spare items.

The rigs I made have a snap swivel on one end, which attaches to the ring at the end of the pole. Attached to this, I have a length of 10 lb test mono-filament fishing line. At the other end is a small-to-medium-sized hook, small split-shot lead sinker and a small bobber. I made two of these rigs and wrapped them around small pieces of cardboard. In a small plastic bag, I put extra hooks, sinkers, line and a bobber. I had a spare stringer in my tackle box, so I decided to include it as well. Both line rigs, the spare materials and the stringer fit into this small canvas pouch, which originally held a German army sewing kit.

Here’s the complete set.

The telescoping rod fits nicely into a cloth rod pouch I got years ago with a telescoping spinning rod. The tackle pouch attaches to the rod pouch nicely. Here’s the Woodsboy presenting Daddy’s new rod-and-line fishing outfit.

After attaching one of the line rigs, it was time to look for bait. We found some small slugs under a large, flat stone and threaded one on the hook.

Now all that’s left to do was to cast it in the water.

Almost right away, we got some nibbles, and within a minute or two we caught this roach (the roach is a small freshwater and brackish water fish in the carp family which usually doesn’t exceed 35 cm/14 inches in length, however a majority of roach caught are about the size shown here, plus or minus).

Here it is next to the leuku, which has a 16 cm/6.3″ blade.

The Woodsboy was very excited about this “really big fishy” that Daddy caught. ;) As soon as I released the fish, it started to rain, so we headed for cover. The Woodsboy wanted to nibble on something, so I cut up a tomato for him.

While it was raining, a gull was taking a bath, so I snapped this shot.

Luckily, it only rained for 10 or 15 minutes, so we didn’t have to wait long. Once the skies cleared, we headed to the fire pit to grill up a sausage and rolls for dinner. I used the Marttiini leuku to prepare wood for the fire.

We roasted up a big, fat “HK Sininen” sausage, a fine delicacy in Finland. ;) I also threw on a few buns we had left from making grilled chicken sandwiches during the week.

A very basic, but filling meal.

If you’re wondering why we grilled a sausage instead of eating fresh fish, you’ve never had a 3-year-old. ;) Plus, it was getting on in the evening and almost time for us to head home. We did want to get in just a little more fishing before we left, though, so I threw the line out again and…

I was really happy to see this rig work well and I’m looking forward to using it again. I mentioned in a previous post that it would be “replacing” my ultralight spinning outfit, but of course that mainly pertains to hook-and-bobber fishing. I’ll still be using spinning outfits for fish like pike, perch etc.

The refurbished leuku also served me well that day. I noticed a tiny bit of play in the bolster that evening and I imagine it loosened up a bit when I split wood with the knife (well, I did want to put the knife through its paces). I managed to feed some epoxy into the small gap under the bolster, so we’ll see how that holds up. I then decided to put a thin coat of teak oil on the handle to add extra protection against water etc. Then I got a little crazy with the teak oil and coated the inside and outside of the sheath with it as well. This was very experimental, and I have no idea how it will turn out! I know there are other ways to protect and harden a sheath, but my curiosity won out over convention this time. After applying the oil, I put both the knife and sheath in the sun to dry.

Both I and the Woodsboy had a lot of fun, and I find it’s getting easier to do this kind of stuff with him now that he’s a little bit older. It made me think about the future and all the trips I’d like to take him on and the things I’d like to teach him. For now, at least, it looks like I’ve got an avid little fisherman and outdoorsman on my hands. I have to mention that, at one point during our fishing experience, he looked at me about once a minute and said, “I like fishing with you, Daddy.” It made my day. :)


Tags: , , , , , , ,

A vintage knife restoration

I didn’t think I needed another knife, but when a “diamond in the rough” project knife recently presented itself for a very low price, I just couldn’t say no. While browsing around at a consignment shop, I spotted a vintage Marttiini “Lapp Knife 250″, which is a small leuku or Saami knife with a 16 cm/6.3″ long and 4 mm/0.16″ thick blade. I like this style of knife very much to begin with, and when I saw the price tag of 15 Euros/19 Dollars, I had no choice but to snap it up. Based on other older Marttiini knives I’ve seen, I roughly dated this one to the 60s or 70s. Finnman from Scandic Woodsman Blog estimates 70s or 80s, so let’s say it’s from the 70s. :)

As you can see, the sheath is roughed up, but still in usable condition. I don’t like the tacky designed-for-tourists motif on these sheaths, but I was able to find a good way to get around that. Some ingenious person had replaced the belt loop with a slit-type loop and cleverly attached it to the sheath with some wire… As great as it looks, the wire had to go. ;)

As for the knife itself, the varnish was coming off the handle, the bolster and pommel cap were a bit beat up and dirty and the blade had lots of sharpening marks and a few nicks in the edge. Overall, though, it seemed like the knife was still pretty solid and usable. Incidentally, I tested the blade to see if it would take a patina, because I was not sure if it was stainless or carbon steel (it proved to be stainless, as it would not take a patina). I later found it to be easy to sharpen and not too hard/brittle, so I’m not concerned about it being stainless.

I started working on the sheath first. I’ve never been a fan of the “fish tail” on sheaths, so I cut it off. I am aware that they serve a purpose (as an aid in withdrawing the knife), but I never use them. The next step was to remove the belt loop and a leather strip glued to the sheath near the top. After this, I sanded the sheath with 240-grit sandpaper to remove the original treatment and to smooth out the roughened spots. To color the sheath and also to hide the touristy design, I decided to use black shoe polish. I realize this is not very “professional”, but it was the easiest solution on short notice. When the sheath and belt loop were dry, I connected them with a piece of strong flat lacing, which I also died black.

Now on to the knife. To get the remaining varnish off, I sanded the handle with 40-grit sandpaper. This was followed by smoothing it out with 100-grit paper. Once the wood was in good shape, I sanded the bolster and pommel cap with 240- and then 400-grit sandpaper to clean and smooth them out. I then rubbed the handle wood with a block of wax and passed the wax-covered handle back and forth over a candle to heat the wood and melt the wax, allowing it to soak into the wood. This was repeated 5 or 6 times. With the handle finished, I turned my attention to the blade. I figured the only way to easily make the blade uniform in appearance throughout would be to sand it, so I started with 100-grit sandpaper and finished with 240. I didn’t feel the need to go any finer than this. The last step was to smooth out the nicks and even out the edge with a diamond rod and then finish it off with a stone. A few minor nicks are still present, but they will disappear over time with continued sharpening.

In all, I worked on this sheath and knife for 4 hours. Here’s the result:

Before and after:

Hopefully, the handle and tang are still structurally sound. I guess I could have checked this out more before I did the restoration work! :) I’ll be using this knife very soon to test it and will let you know how it works out. I may do a little more cosmetic work to clean up a few things, but for the most part I’m happy with how it came out. Yet another great consignment shop find!


Tags: , , , ,